
Google Webmaster Tools Tutorial – Part 3: Advanced Features of Google Webmaster Tools
In the final installment of our 3 part tutorial on how to use Google Webmaster Tools we are going to discuss a few more advanced features that the service has to offer.
International Targeting
Depending on what type of services or products your business offers, country targeting is very useful in determining where you viewers are located in a geographical sense. For example, if your company was focused on a specific country target audience, say the United States, we can tell Google that we want to target searches that originate from Americans.
To set a targeted country for your website, start off by clicking the “Search Traffic” heading on the left toolbar. After the new subheadings appear, click on “International Targeting” and you will be taken to page with two tabs, offering to change between Language and Country.

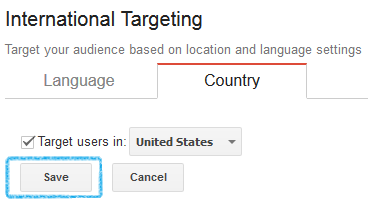
Setting which country you wish to target is as simple as clicking the “Country” tab, as highlighted in blue and ticking the checkbox next to “Target users in:” . After you’ve designated that you wish to target a specific country, the drop menu will be accessible and you can choose the country that is most relevant to your business.

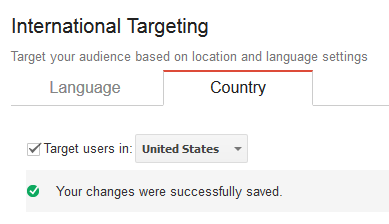
After you’ve selected your country of choice, click save, and you’re done! Now, you will more likely experience better results for the Top-Level domain that Google is now targeting.
But, keep in mind that when geo-targeting a specific country that you will lose out on the detailed traffic analysis that Webmaster Tools provides for other countries. If at any time you wish to stop targeting specific countries, you can return to this page and un-tick the checkbox and Google will know that you are now targeting users on a worldwide basis once again.
Letting Google Know About a Site Move
If you ever decide to move your website to a new domain, it is very helpful to give Google a little heads up so that they can update their index to reflect your new URL. Remember, the change of address tool is only available to authorized owners of the website. So, with that being said, don’t forget to upload a new verification file to your server so that Googlebot knows you own the website.
To get started, click the gear icon near the top right-hand corner of your Webmaster Tools dashboard. A list of options will appear, click “Change of Address” to get going with your domain move alert.

Google will ask you to take care of a few things before you change your address, including adding all of your content to your new site location, redirecting content from your old site via 301 redirects and of course making sure your new website is verified to your Webmaster Tools account.
Additionally, directly from their website, there are a few other things you need to keep in mind as well:

Automatic Google My Business Verification with Google Webmaster Tools
If there haven’t been enough reasons already, another reason to use Webmaster Tools is the ability to have your Google My Business listing automatically verified. All you have to do is to make sure that you are signed into the same Google account that you associate your website’s Webmaster Tools account with when making your Business listing.
Unfortunately, not all businesses will be able to try for instant verification as not all business categories are eligible. If you fall into one of these categories, you can still go to this page and use the walkthrough Google has provided to verify your business.
That’s a Wrap, Everybody!
Take a minute to pat yourself on the back, you made it through the entire tutorial on how to use Google Webmaster Tools! You’re now on the fast track to analyzing your traffic and keeping up to date with all the associated keywords that go with it with the help of Webmaster Tools.
Remember, if you ever get stuck, lost or just have a question about the tutorial, gives us a shout on Twitter @techfunction and we’ll be glad to help you the best we can!
Recent Comments